How to host a static website on Backblaze B2 with Cloudflare Workers

These days to host static website you do not need a webspace or vps. If you stay below 100k reguests per 24h and don’t use more than 10GB storage your website would even be free. Only if you use more than that it costs you something, but remains within a manageable range.
Why Backblaze B2
Backblaze B2 is a cheap alternative to AWS S3. For only 0.005 USD per GB Storage and 0.01 USD per GB transfer per month it is much cheaper than other S3 services. If you are using Backblaze and Cloudflare together it is even cheaper, because you are saving the 0.01 USD transfer cost.
Only with these two tools you can create a CDN for free. To create something like this, there is a help article in the Backblaze help section , explaining how to create a CDN with a public bucket at Backblaze B2 and a domain at Cloudflare. So I thought why not host a static page there, similar to what is possible this AWS S3.
Problems with B2
Unfortunately with Backblaze B2 it is not as easy as it is with AWS S3 to host a static page. If a sitepath is given B2 is not automatically searching for index files and therefore does not search for an index.html. Another smaler thing is that there is no fancy site for 404 errors. To deal with these issues the Cloudflare Workers come into the game. They can change http requests for example to load an index.html if a path is given.
Setup Backblaze
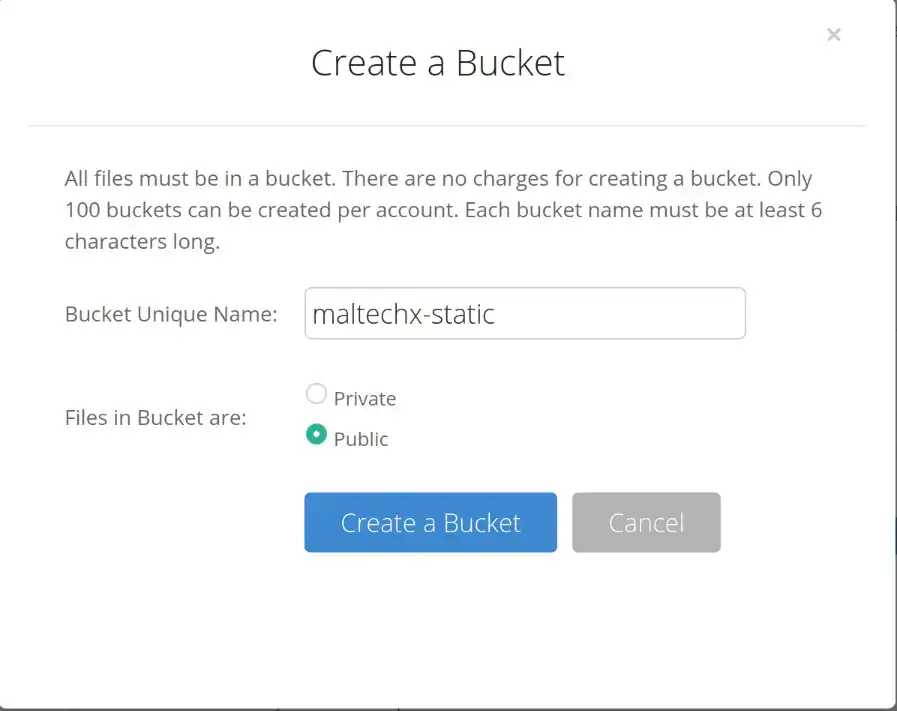
But now to the actual instructions: First of all you need to create at Backblaze a public bucket:

The next step is to upload your website-data. You can do this either over the webinterface or you use the Command-Line Tool
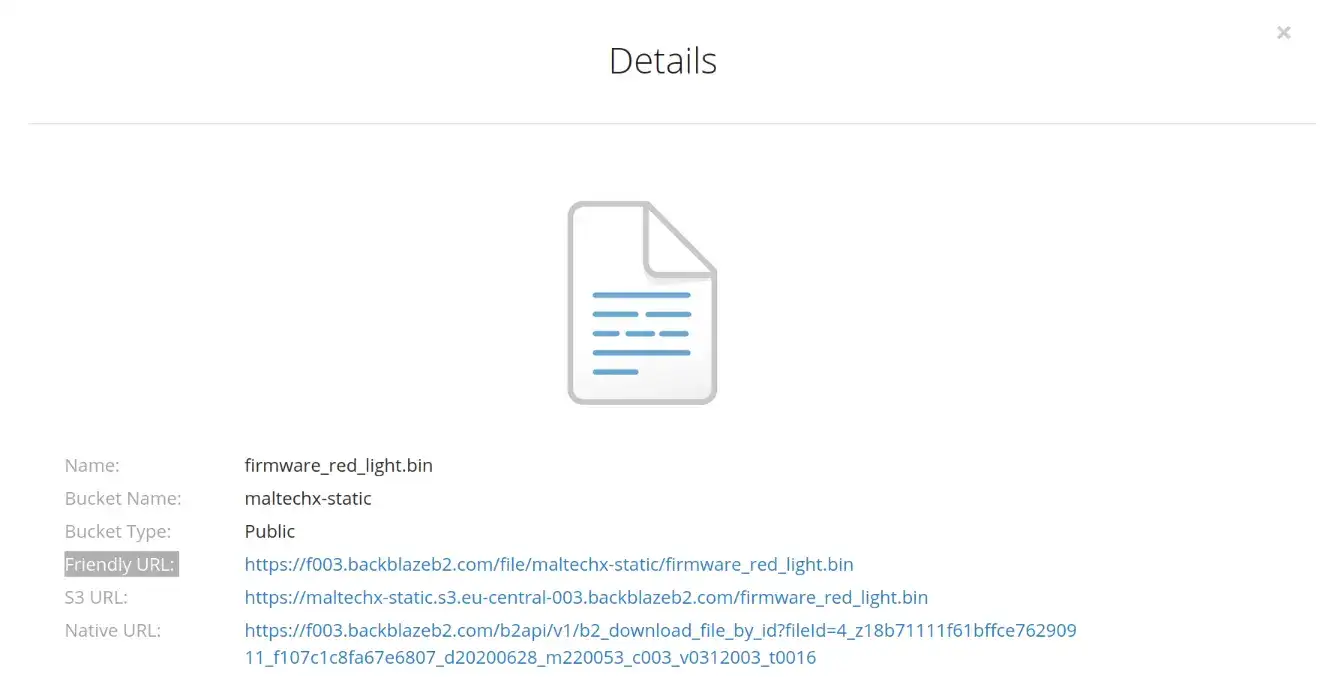
. When your data has been successfully uploaded to Backblaze you should be able to use th ion any file and get the details of that file. You need to copy there the Friendly URL without the full path and filename eg. https://f003.backblazeb2.com/file/yourbucket. We need this information to load data from Backblaze with the Cloudflare Workers.

The configuration of the Backblaze bucket is now done and you can continue with the configuration of the Cloudflare Workers.
Setup Cloudflare Workers
I assume that a domain has already been setup at Cloudflare. So now it is time to create a Worker. To create a Worker on the startpage after the login you click on Workers and then Create Worker. The following script is used to forward pathnames to the corresponding index.html:
Just copy the script into the Worker editor and if applicable change it to your needs. But you definitely need to change the baseURL variable to the previously copied Friendly-URL. Now you can give the worker a name and deploy the thing. Before finally routing our domain on the Worker you should test it. To do so you can reach the final site on yourworker.yourusername.workers.dev.
The last step is to create a DNS entry with proxy enabled and route your domain to the Worker. To create a worker route, on the domain start page you need to go to Workers and build you Worker Route. As route you define your just created hostname eg maltechx.de/*. The destination is the previously configured Worker.
Thats it you site should now be reachable. If you have questions, problems or found an error contact me.