Improve your BufferBloat with Traffic Shaping in Opnsense with IPv6

In this guide I will show you how to setup traffic shaping with fq_codel. I did this on my own Opnsense firewall, which is running on a Vodafone Cable connection with 1 Gbit/s. With traffic shaping I could improve my BufferBloat Rating from D to A. I basically followed this guide, but it seems like IPv6 and dynamic prefixes where not that important in 2018. So I created this guide to show you how to archive this with dynamic prefixes and IPv6.
I will only show how basic traffic shaping, to improve your BufferBloat rating, works. Other usecases, like limiting the bandwith per user are things I will likely cover in future blog posts.
This guide was tested by me on Opnsense Version 21.1.2. If the process changes in future, I will update this guide.
Pipes
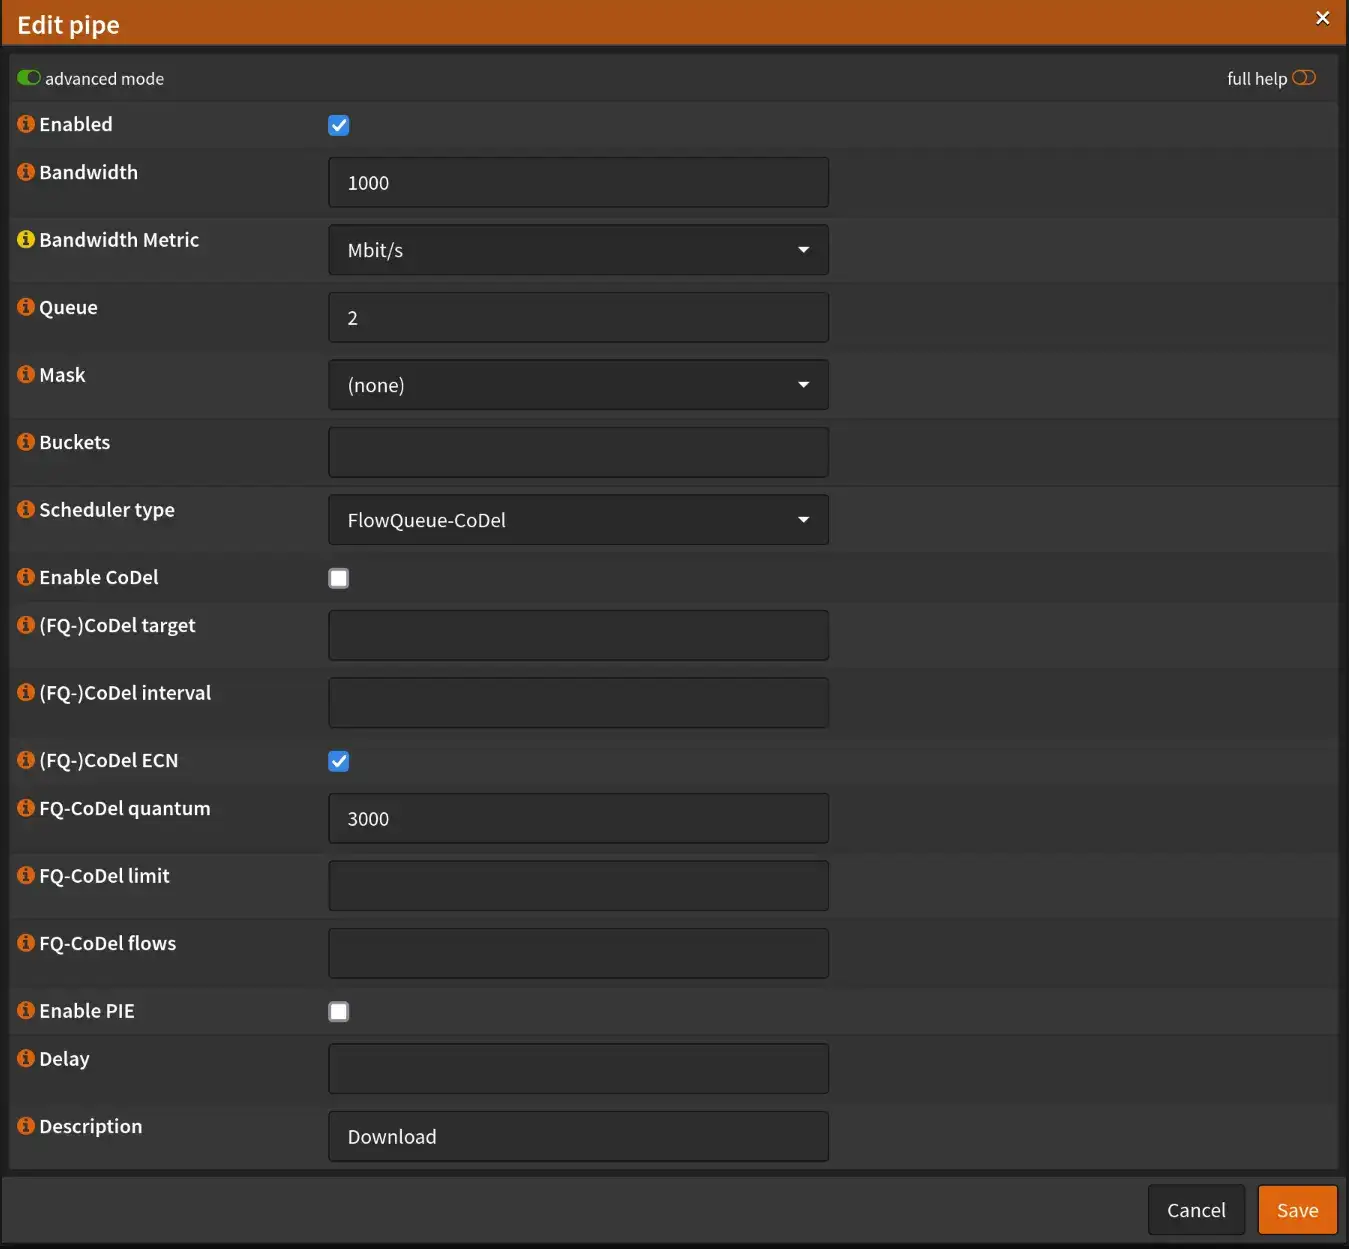
Before starting we have to go to Firewall > Shaper > Pipes in the Opnsense interface. There we create two pipes, one for the download an the other for the upload. To create the pipes we klick on the small plus on the right side. It is important to enable advanced mode on the top left corner to view all possible settings. Now we need to change Bandwidth acording to what we have, enable (FQ-)CoDel ECN, set Scheduler type to FlowQueue-CoDel and set Queue to 2. The values for quantum and limit are calculated after the formular 300 pro 100Mbit/s. For the 1Gbit/s it is then 300 * 10 = 3000. Please give the pipe a description like me.
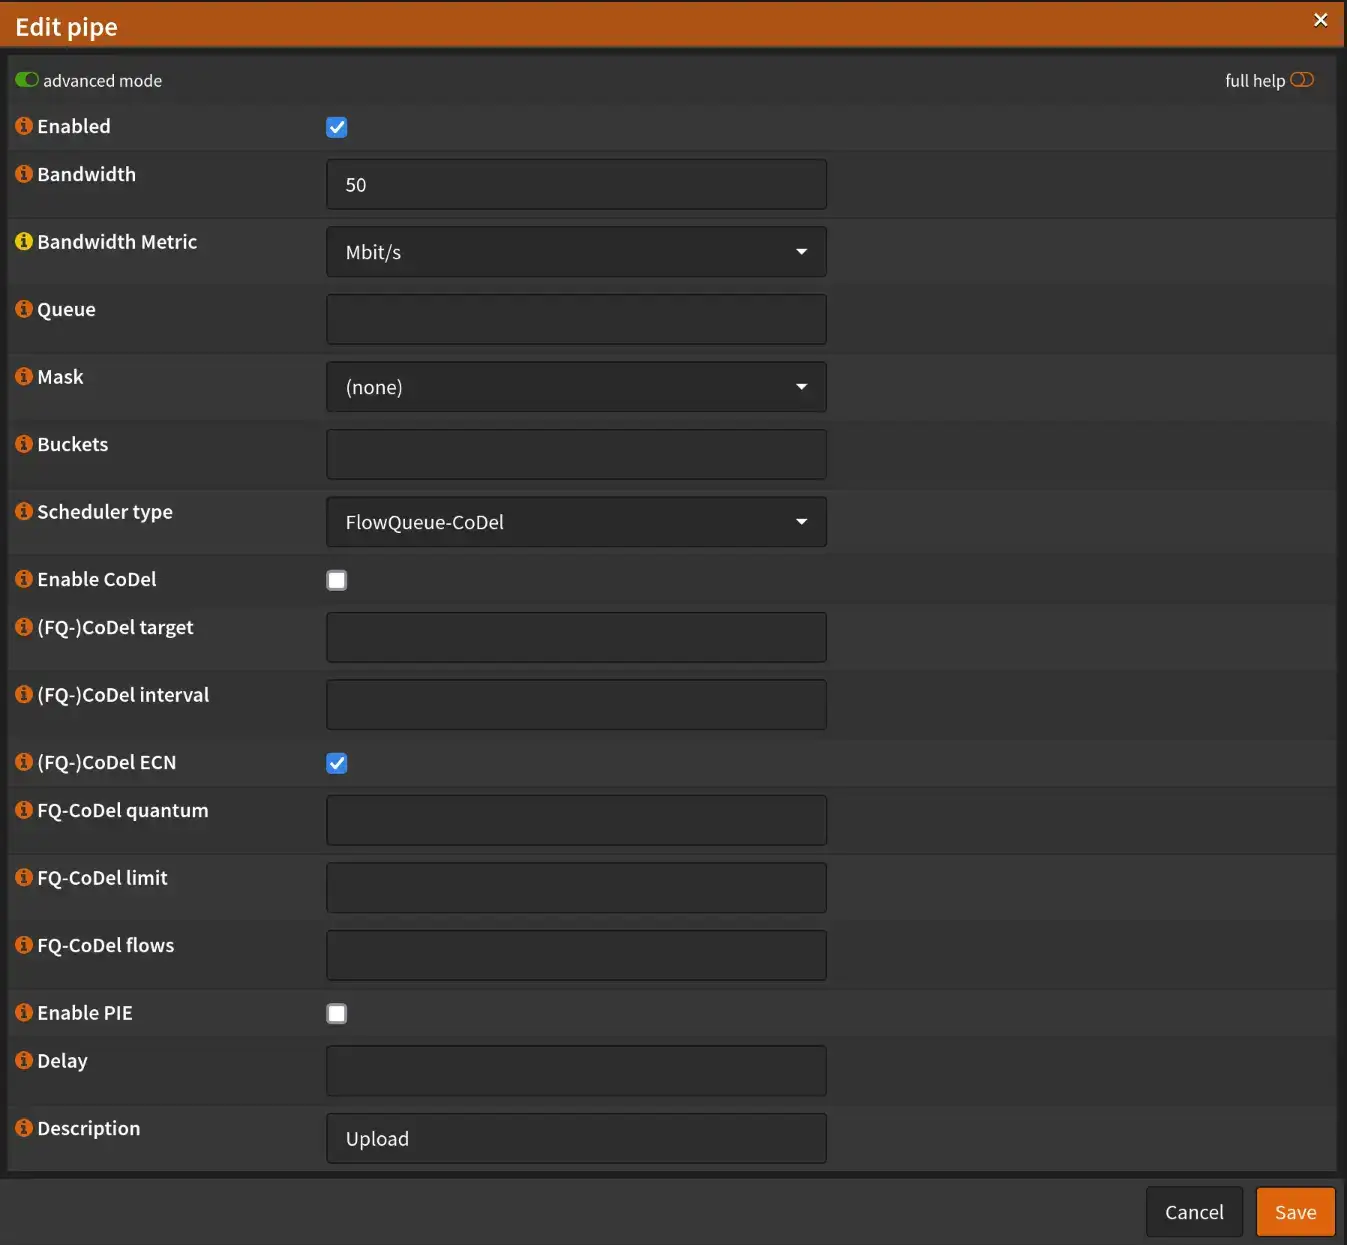
Now we can save the first pipe and continue with the upload pipe. We only change Scheduler type and (FQ-)CoDel ECN, like in the download pipe.
After saving we need to click on apply and can continue with the next tab.
Queues
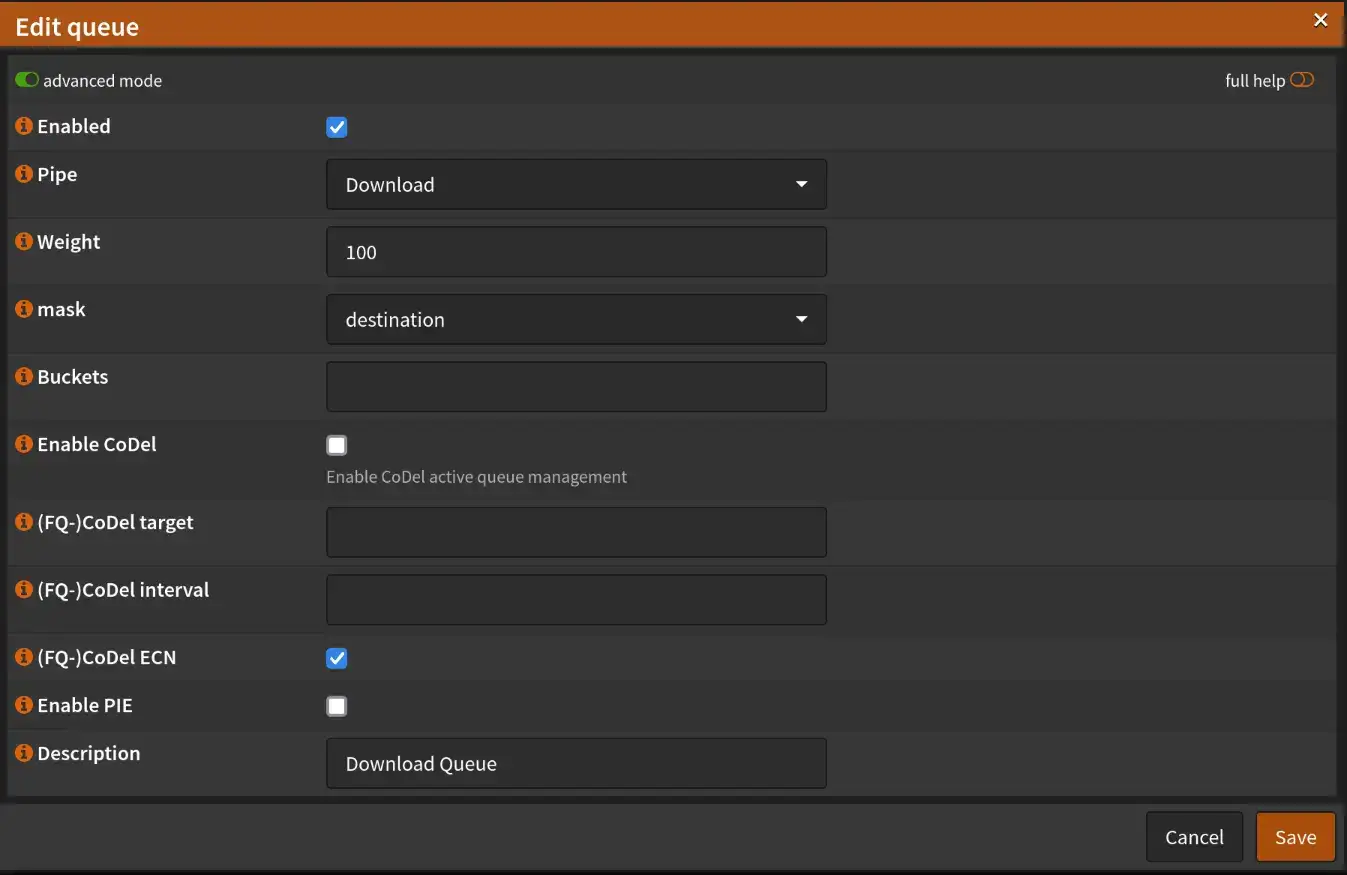
Next we switch to the Queues tab unter Shaper to create two Queues. The Queues can be created like before by clicking on the plus. On both queues we set the weight to 100 and enable the (FQ-)CoDel ECN. Both queues only differ by the selected pipe and mask. For the download queue select download on pipe and set mask to destination.
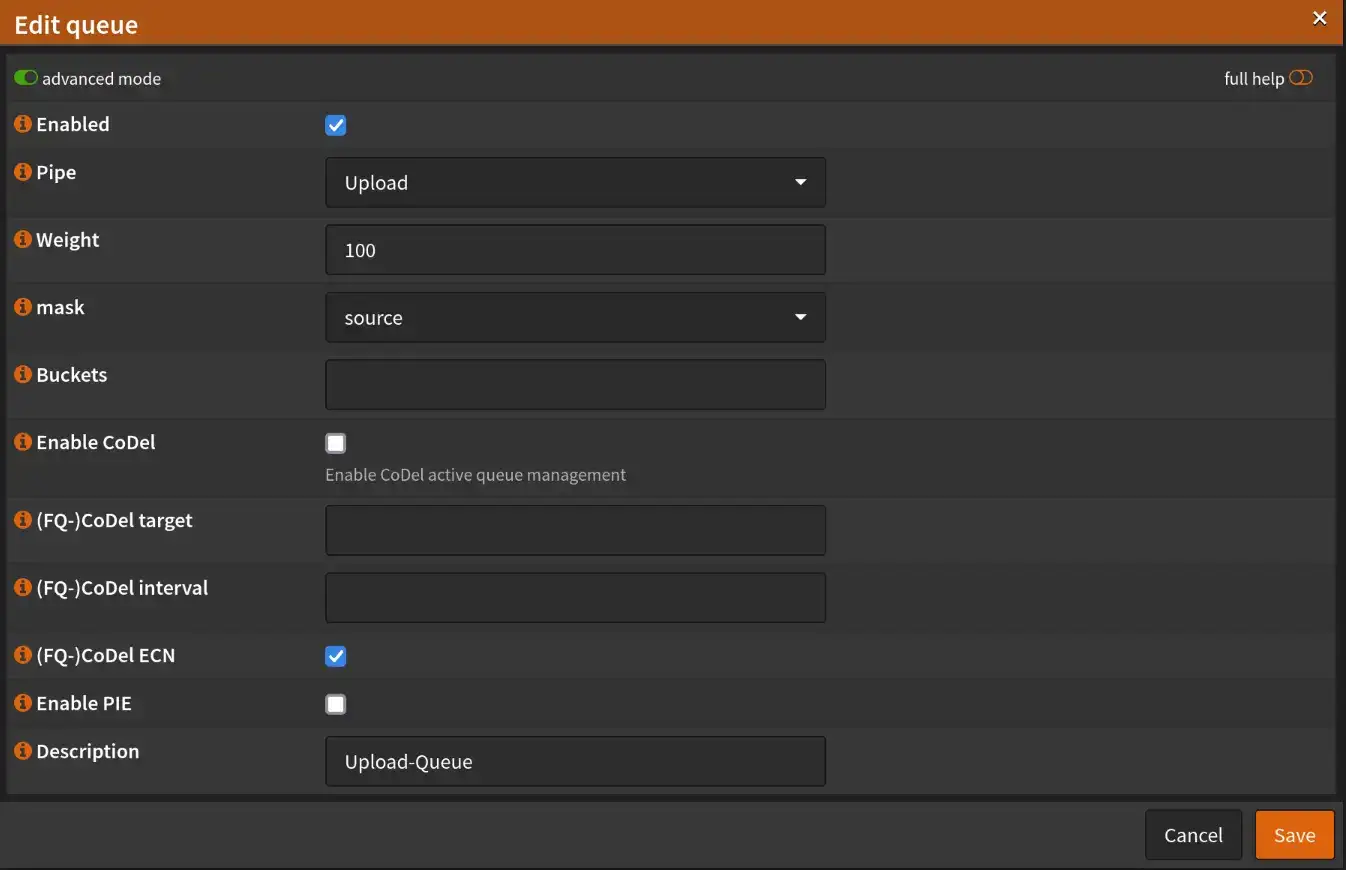
On the upload queue we select Pipe Upload and set mask to source.
Rules
This part differs from other guides, because they usually set the rules to match the packets by source or destination ip. This is not possible with dynamic prefixes, as they change and you would have to adjust the rules on every prefix change. Therefore we are matching the packets by flow direction in the interface.
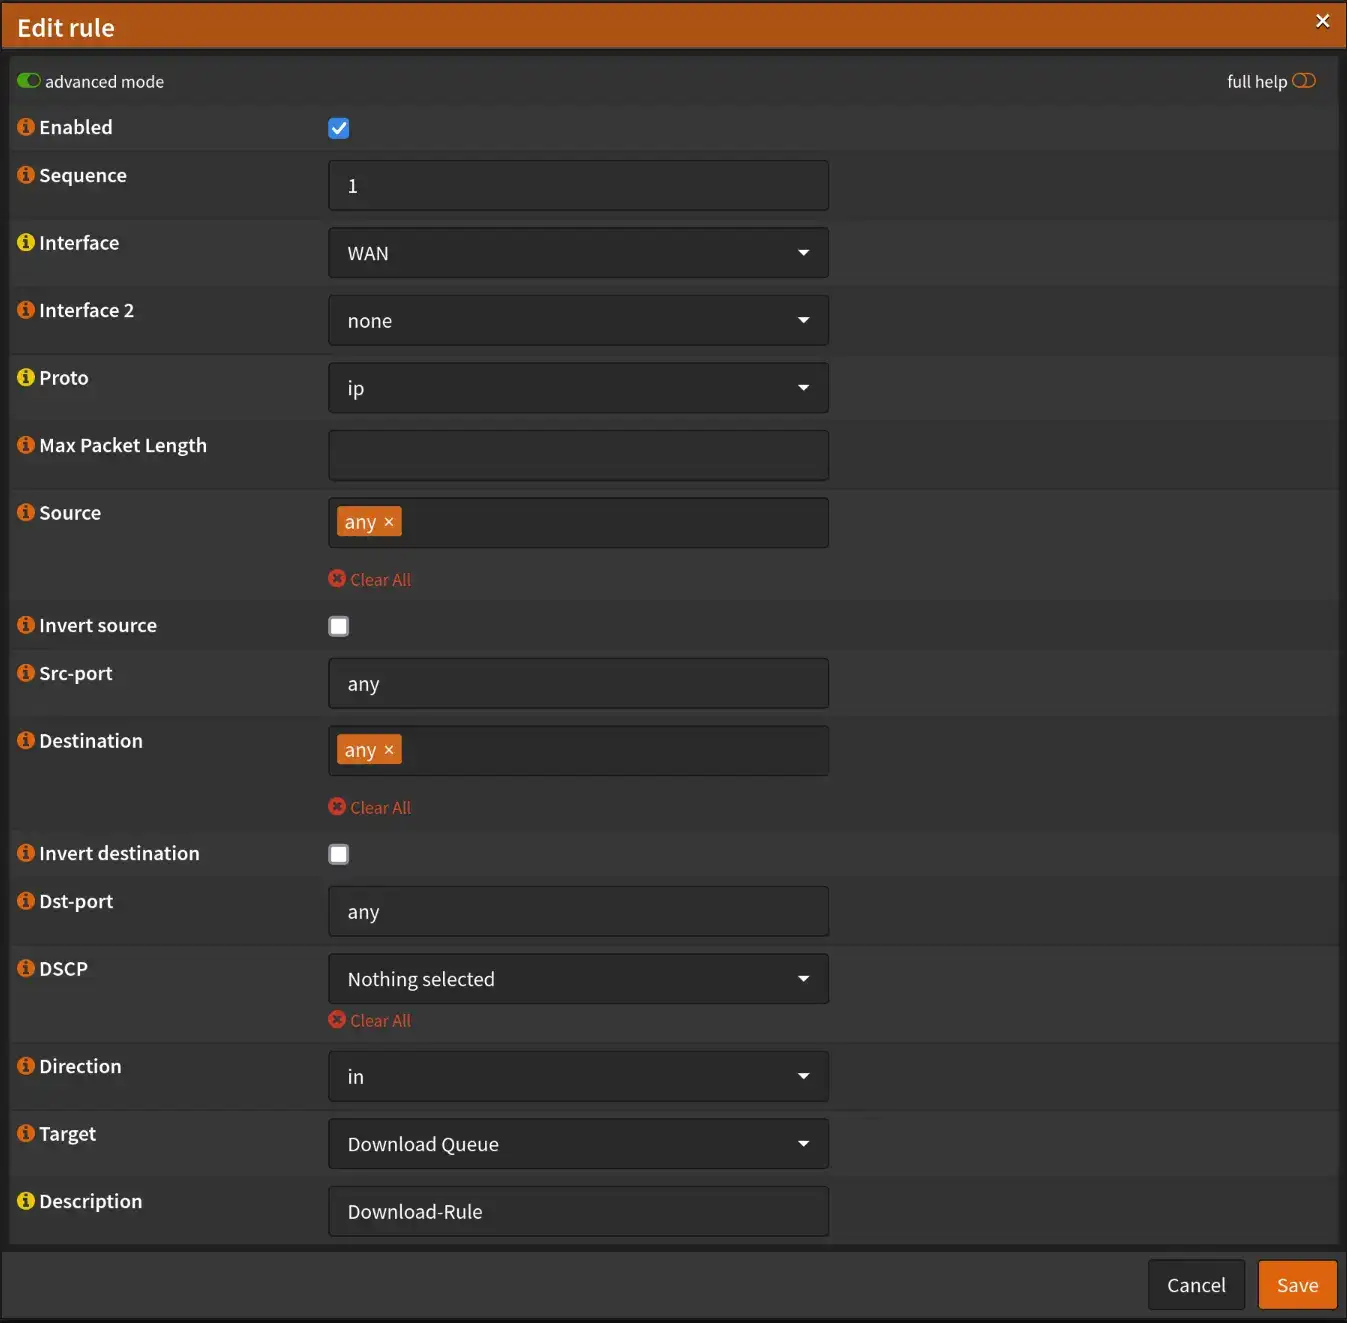
Now we switch into the Rules tab. We create two rules for download and upload. To do this, we click on the plus, as in the previous steps, and create our rule according to the following screenshot. Important is to activate the advanced mode again and to choose direction in. As target we use our previous created download queue. The interface should be set to our wan interface, if we want to apply this rule to all traffic in- and outoing.
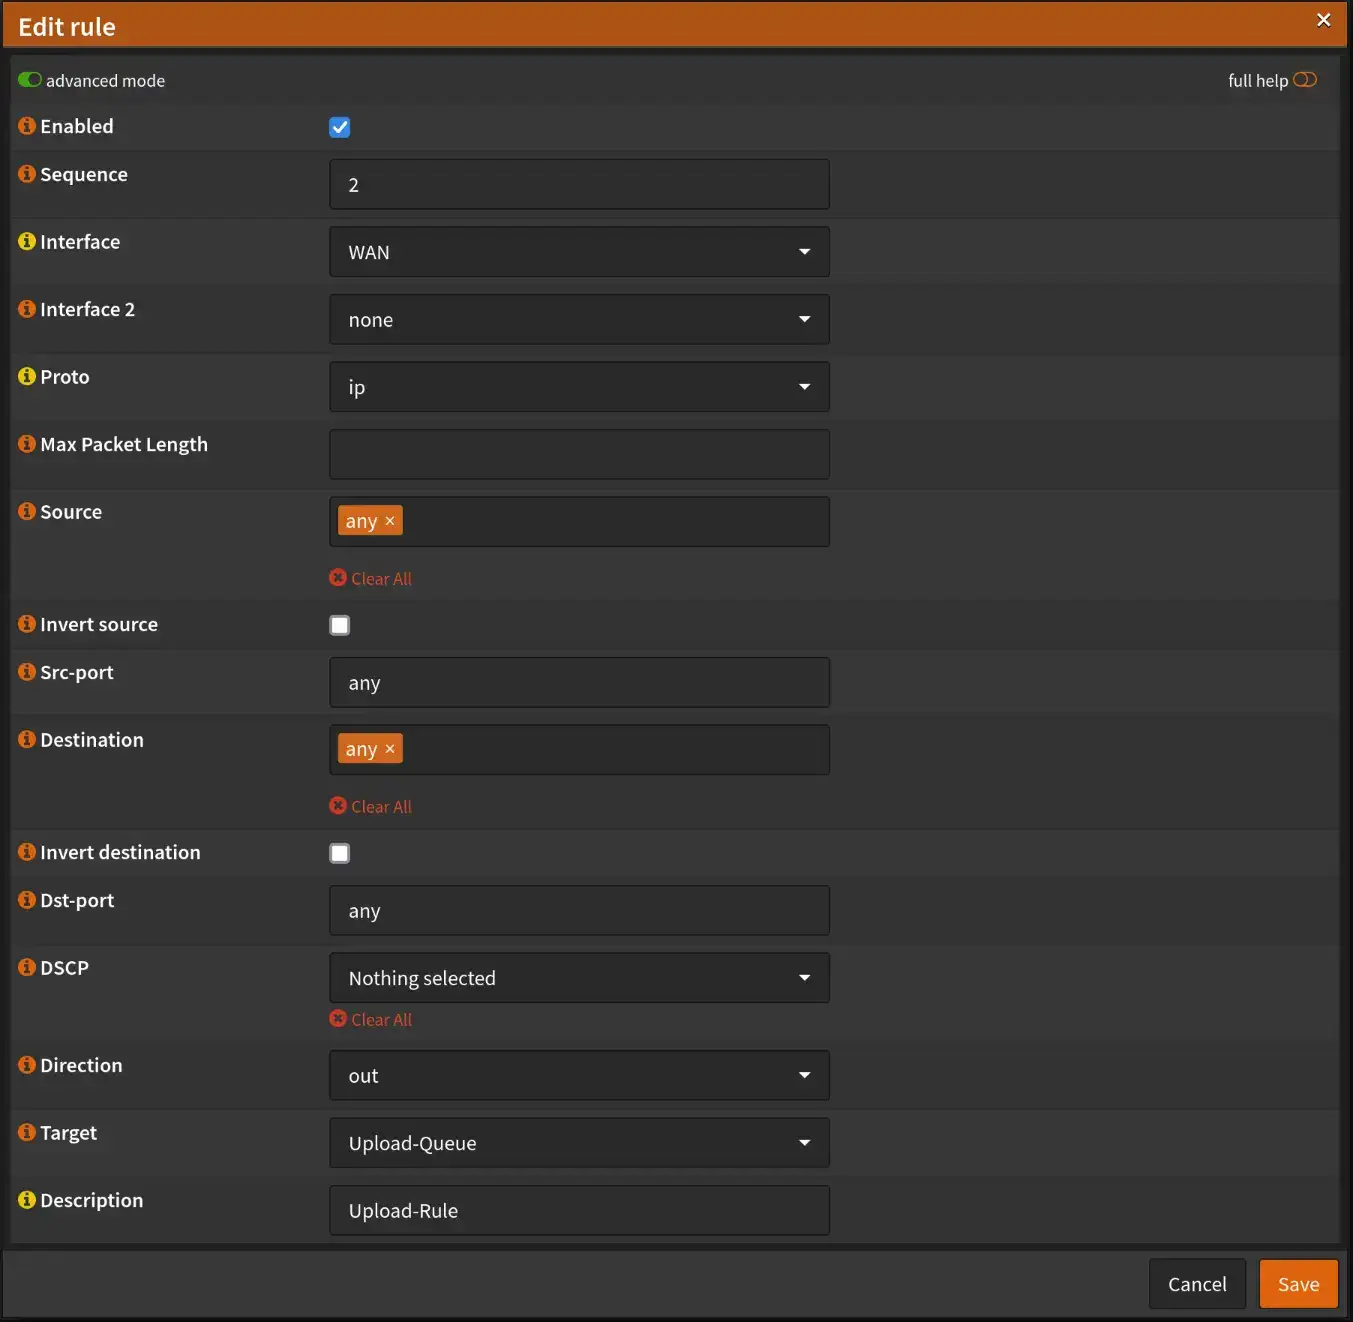
The upload rule looks pretty much the same, with the only difference being direction out than in and the target here is, our previous created, upload queue.
Our traffic shaping should now work.
Conclusion
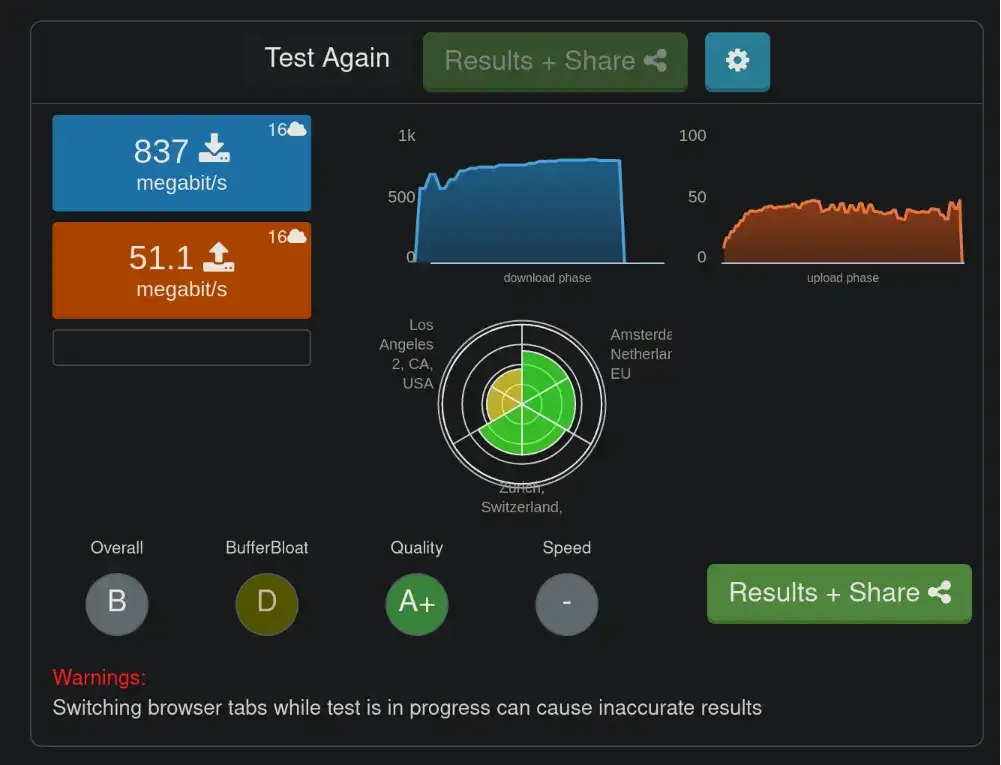
Before I used traffic shaping, my BufferBloat rating was at B.
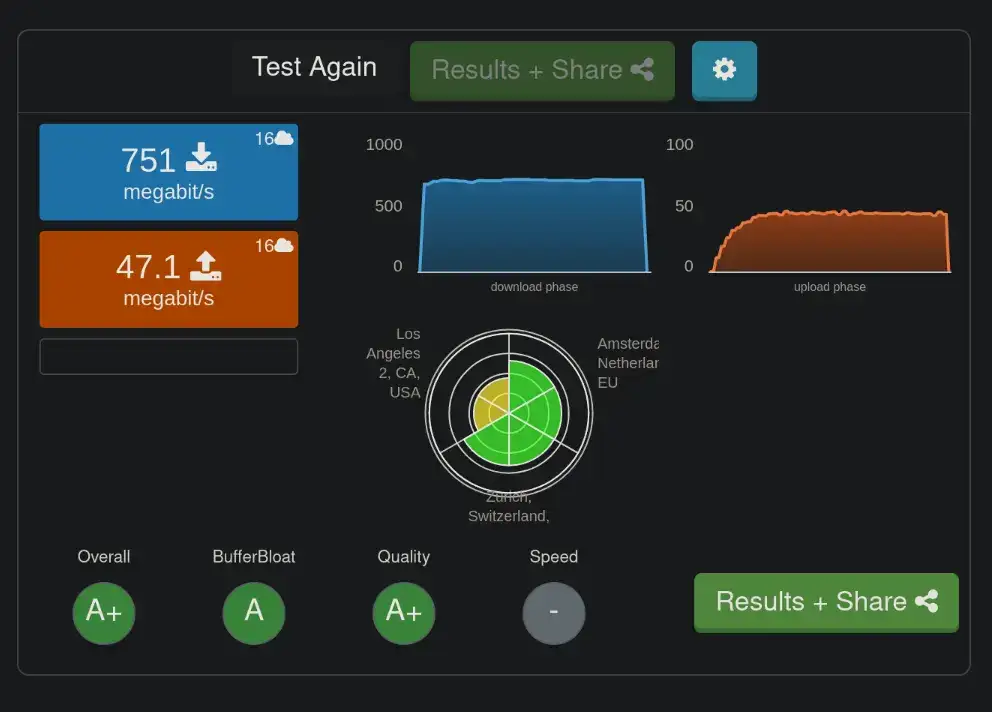
In comparison after enabling it, I had a rating of A.
If you have encountered any problems or have any questions, just let me know.